In China, the nondestructive testing of internal defects in steel structure welds shall conform to the following provisions.
(1) When ultrasonic testing is used, the ultrasonic testing equipment, process requirements, and defect assessment level shall be by the provisions of the current national standard “Steel Structure Welding Code” GB50661;
(2) When ultrasonic flaw detection cannot be used or the results of ultrasonic testing are doubtful, ray detection can be used for verification, and the ray detection technology shall be in line with the current national standards of “nondestructive testing of welds Radiographic Inspection Part 1: X and gamma-ray film technology” GB/T3323.1 or “nondestructive testing of welds Radiographic Inspection Part 2: use of digitized detector X and gamma-ray technology” GB/T3323.2 or “nondestructive testing of welds Radiographic Inspection Part 2: use of digitized detector X and gamma-ray technology” GB/T3323.2. T3323.2, the defect assessment level should be in line with the current national standard “Steel Structure Welding Code” GB50661;
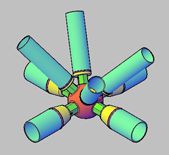
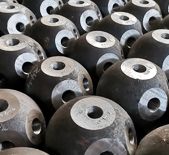
(3) The ultrasonic flaw detection method and defect grading of welded ball node space frame, bolted ball node space frame and round pipe T, K, and Y node welds shall comply with the relevant provisions of the current national and industry standards.
Number of inspections: Full number of inspections.
Inspection method: Check ultrasonic or radiographic records.
According to the different load-bearing situations of the structure, the current national standard “Steel Structure Welding Code” GB50661 will be divided into three quality levels of the quality of the weld. Detection of internal defects is generally available in ultrasonic flaw detection and ray detection.
Radiation flaw detection has the advantages of intuition, and consistency, but with the high cost of radiation flaw detection, complex operating procedures, and long detection cycle, especially in the steel structure, most of the T-shaped joints and corner joints, the effect of ray detection is poor, and the ray detection of cracks not fused to the detection rate of hazardous defects such as low.
Ultrasonic flaw detection is just the opposite, the operation procedure is simple, fast, good adaptability to various joint forms, and cracks, and unfused detection of high sensitivity, therefore, the control of the internal quality of the steel structure using ultrasonic flaw detection generally has not been used for ray flaw detection. Unless ultrasonic flaw detection cannot be used or the results of ultrasonic testing are doubtful, ray detection can be used to supplement or verify.


 About Us
 2024-05-15


